
Are you excited about the new version of PrestaShop 1.7 that has been announced? It contains a lot of rewritten code, a new theme, and a couple of new features. The down side about it, is there is currently no installer package for it like the previous versions of PrestaShop. So we decided to make a tutorial to show you how to install it on a Digital Ocean droplet so you can test it out.
Installing PrestaShop 1.7
Now remember, these instructions are only for the alpha releases, when 1.7 is released it will b
e released with an installer like all previous versions of PrestaShop. So don’t worry about it being this complicated in the future.
First we go to Digital Ocean, once you sign up for an account you can select which operating system you want your server to run on. I chose Ubuntu 14.04 because I use Ubuntu as my desktop operating system and I am most familiar with it.
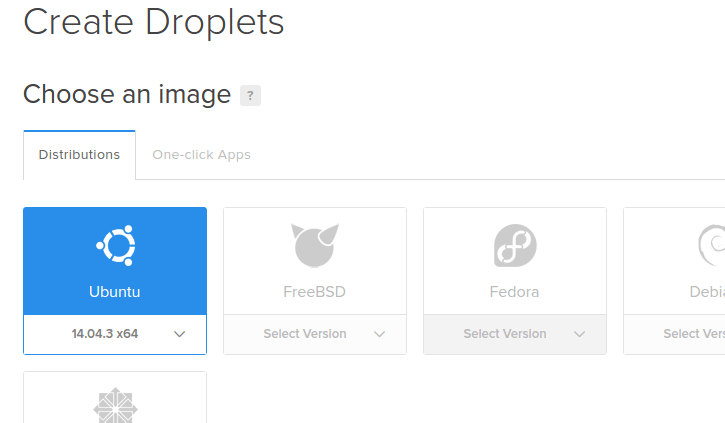
After you choose your operating system (this tutorial might not be any good if you do not choose Ubuntu) then click on the “One-click Apps” tab. From there select “PHPMyAdmin on 14.04”. Selecting this image makes it where you do not have to manage your database from the command line. Once you have selected this image, you can select your droplet size. Be sure to use at least a 2gb droplet. Composer will not run with the 1gb droplet, it will run out of memory. After that you can select the region for your server and create the droplet, you do not need to select any of the other options unless you know how to use them.
Connecting to your server
Once you have created your image, you will need to connect to your server via ssh. You can either use Putty if you are on Windows, or you can use your ssh client if you are on Linux or OSX. After your droplet is created it will look like the image below.

Here you can see the ip address of your server, the user name to login will be root. You should get an email shortly with your temporary password to login to your server. If you are using Putty on Windows start it up and it will ask you for the information to log in. If you are using a linux type operating system press control + alt +t and open your terminal. The command to login should look something like the one below.
ssh root@159.203.112.165
Once you login the server will ask you for your password, you can either paste it or type it in. After you enter your password, it will request it again and prompt you to change the default password.
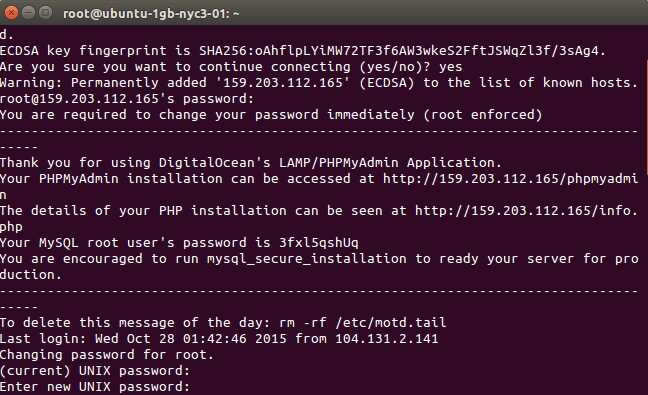
Once you have changed your passwords, the next thing you will need to do is to update the system. Since Digital Ocean servers are built from images, they might not run the latest version with the latest security / bug fixes. You can update your system using the command below.
sudo apt-get update
Once this finishes it is time to get down to business. First we need to locate our MYSQL password. Type the command below to get your password.
cat /etc/motd.tail
You should see a printout like below with your password. I have pixelated mine out for the screenshot.
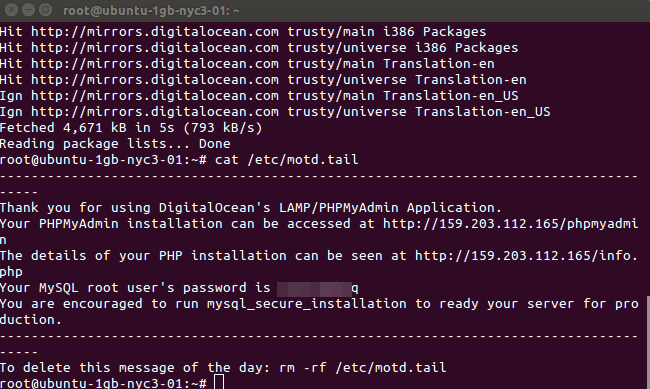
Once you have the password, write it down, you will need it for this next step. With whatever IP address Digital Ocean assigned you, go to yourserveripaddress/phpmyadmin from there login with the username root and the password you just copied. You are going to want to create your database for PrestaShop in here. Click Databases from the menu when you get logged in, once there name your database and click create. We named ours prestashop to keep things simple.
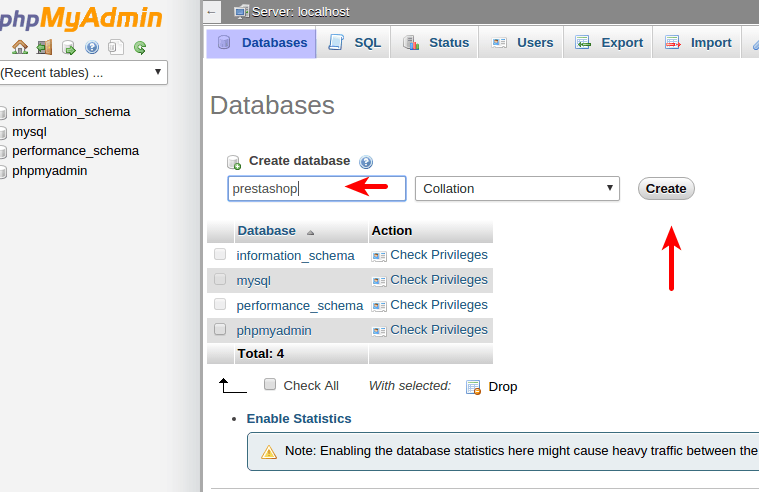
Once you have created your database you will need to switch back over to the ssh window to complete the rest of the setup. Once in the window enter the command below and it will take you to the root web folder on your server.
cd /var/www/html
After you are there you will need to install Git so you can pull the development files from the PrestaShop repository. To install Git use the command below.
sudo apt-get install git
It will ask you if you want to install after it loads the files, type y and press enter.
Where it gets more complicated
Now it starts to get a little bit more complicated. Once you install git, you need a public key to use with git. You also need a Github account as well. Type the command below into your ssh terminal and you can create a key.
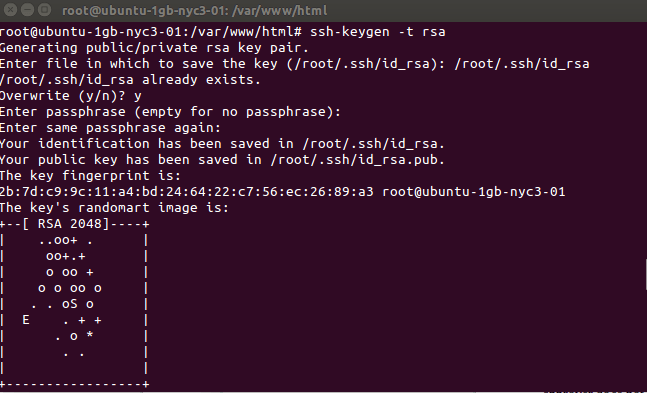
ssh-keygen -t rsa
It will ask you where you want to save the keyfile, use the below address.
/root/.shh/id_rsa
After you enter the location it will ask you for a passphrase, remember this phrase, you will need it later. Once you have entered the phrase, you should see something like below.
Once you have created the key, you will need to run the command below so you can copy the publickey.
vi /root/.ssh/id_rsa.pub
When you run this command a window like below should open up. you can highlight the contents, right click and copy.
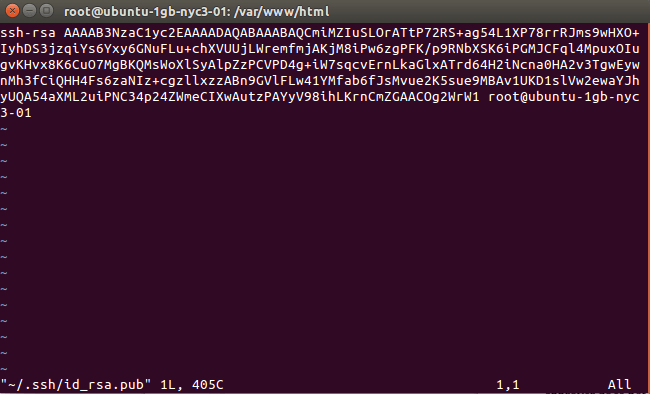
Once you copy the key to your clip board press shift + : and a blinking cursor will appear at the bottom of the window. Type q and press enter and it will close the vi editor.
Now you will need to log into your github account to use the key. Once you are logged in got to your account settings page. Then click on SSH Keys.
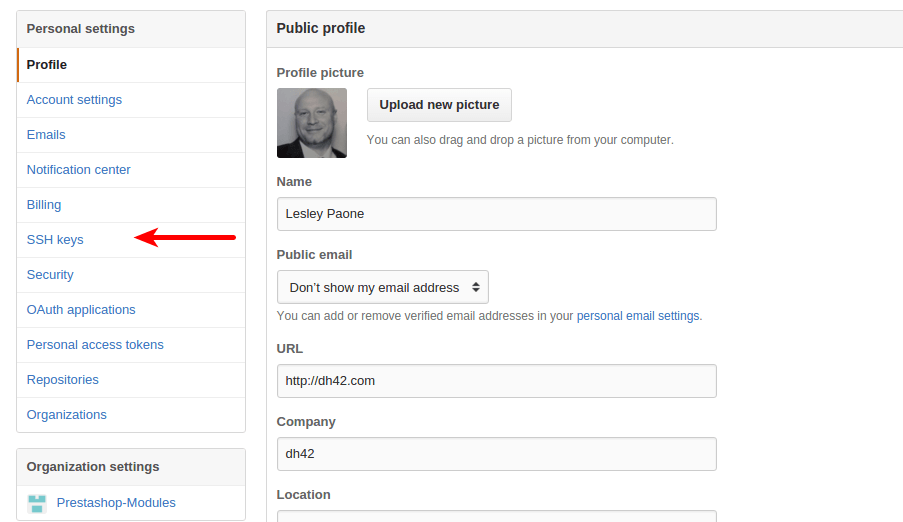
When you are in the SSH Key page, click “New SSH key” at the top right. Give the key a title, I name mine PrestaShop. Then in the key area paste what you just copied from the vi editor and press “Add SSH key”. This will add the key to your Github account so you can connect to Github and download the latest build of PrestaShop 1.7. Once you have added the key, go back to your ssh client and type the command below.
git clone git@github.com:PrestaShop/PrestaShop.git
This will take a minute, it will pull PrestaShop’s dev version from the repository to your server. Once this is done you will need to install composer. You can find the command to run from the ssh Window on their site, or use the one below.
php -r "readfile('https://getcomposer.org/installer');" > composer-setup.php
php -r "if (hash('SHA384', file_get_contents('composer-setup.php')) === 'fd26ce67e3b237fffd5e5544b45b0d92c41a4afe3e3f778e942e43ce6be197b9cdc7c251dcde6e2a52297ea269370680') { echo 'Installer verified'; } else { echo 'Installer corrupt'; unlink('composer-setup.php'); }"
php composer-setup.php
php -r "unlink('composer-setup.php');"
You will have to hit enter once after you paste the code above, and once more at the end to run the last command.
Now you will need to install NPM and Nodejs. Run the first command below to install NPM
sudo apt-get install npm
And this command to install Nodejs
sudo apt-get install nodejs
Then this command to install cUrl on the server.
sudo apt-get install php5-curl
Now we are getting close. Run the command below to switch to the directory that PrestaShop has downloaded to.
cd /var/html/www/PrestaShop
Before you run Composer, you will have to adjust the memory limit on your server or Composer will error out. Type the command below to edit your php.ini
vi /etc/php5/apache2/php.ini
Find the line that defines the memory for php, it looks like the image below.
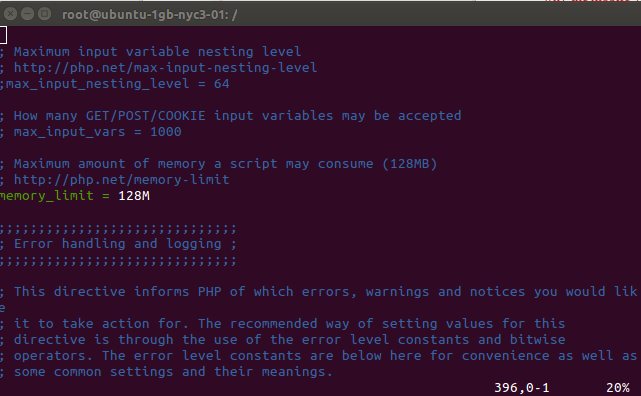
To edit the file press i and you can edit the memory. I would go with 2048 just to make sure there is enough memory. After you have changed the memory to 2048M press the escape key. User the memory add this line.
date.timezone = "America/Chicago"
PrestaShop will not install without a timezone being set in the php.ini.
Now press : and type wq and press enter. This will save your changes. Now you will need to restart Apache for the memory change to take affect. Type the command below.
sudo service apache2 restart
Now we have to load all of the dependencies that PrestaShop uses for the new version. Run the command below.
php composer.phar install
After you run composer you should see a screen like the one below asking for a token.
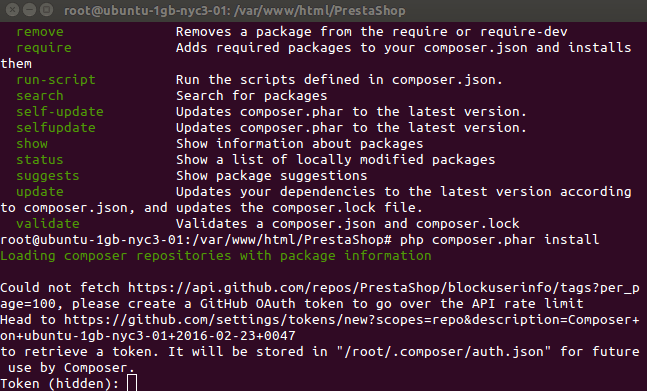
What it is asking for is a token created in your Github account. To create a token log into your Github account and click “Presonal access tokens” in the left menu, then click generate a new token. 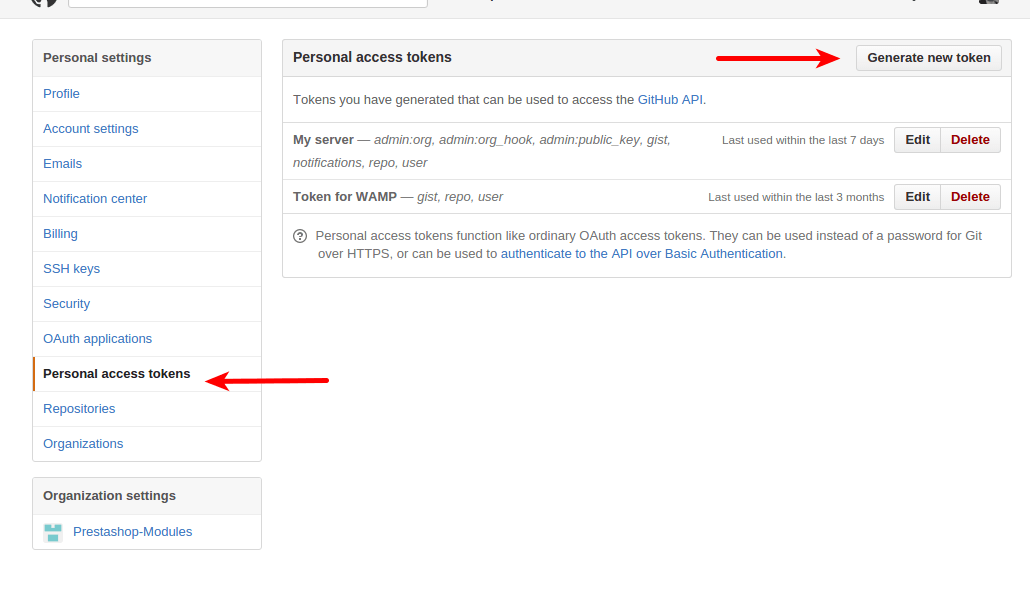
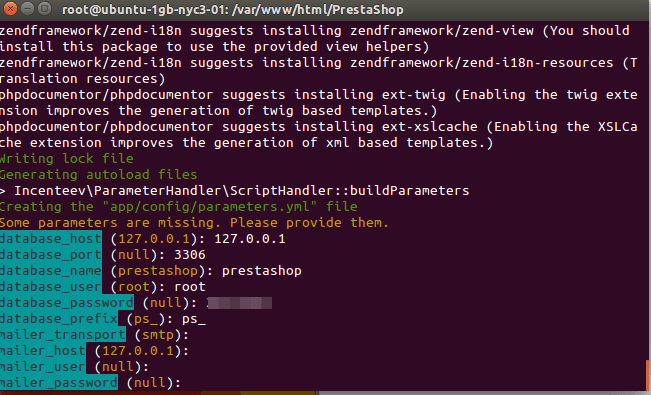
One the next screen it will ask you what permissions for the token to have. For simplicity sake, click all of the check boxes, because you can delete the token later. After you create the token it will let you copy it to the clipboard. Do that and paste the token in your ssh client. Composer will start to run after you do this. It will take compose a while to download everything that is needed. Have your database password handy at this stage. Close to the end of installing all of the components the installer will ask you some questions about the the server. Most of them are below, with the exception of your passphrase, just use something you will remember for that.
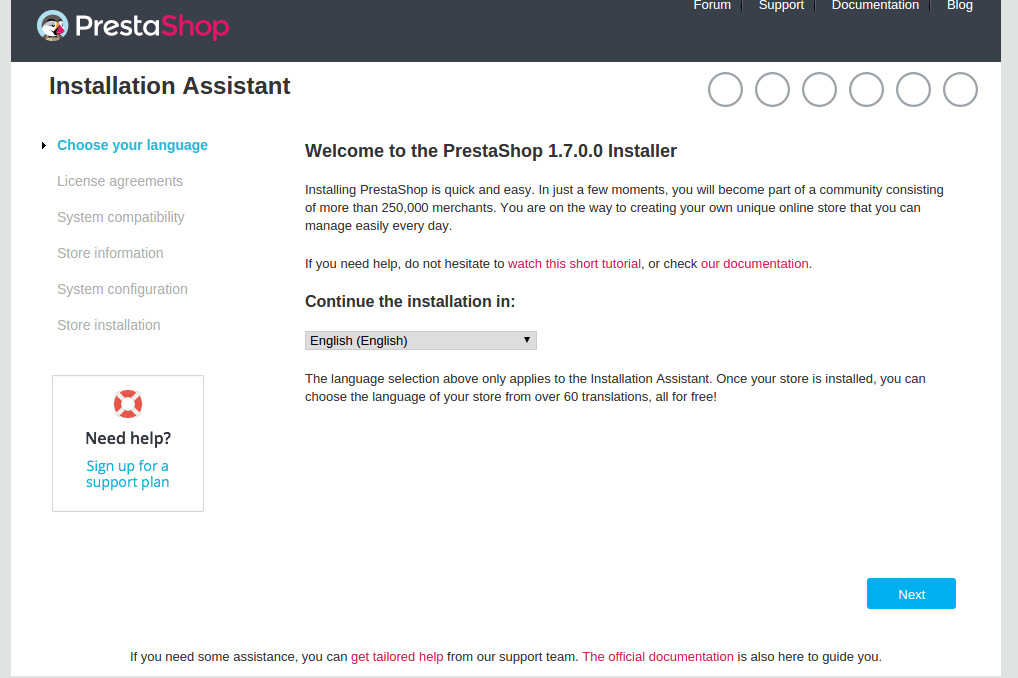
After Composer has run, navigate your browser to the ip address for the server /PrestaShop and you should see this glorious screen.
As you make it through the installation process, your hopes will quickly be dashed though. Two screens later you will see this.
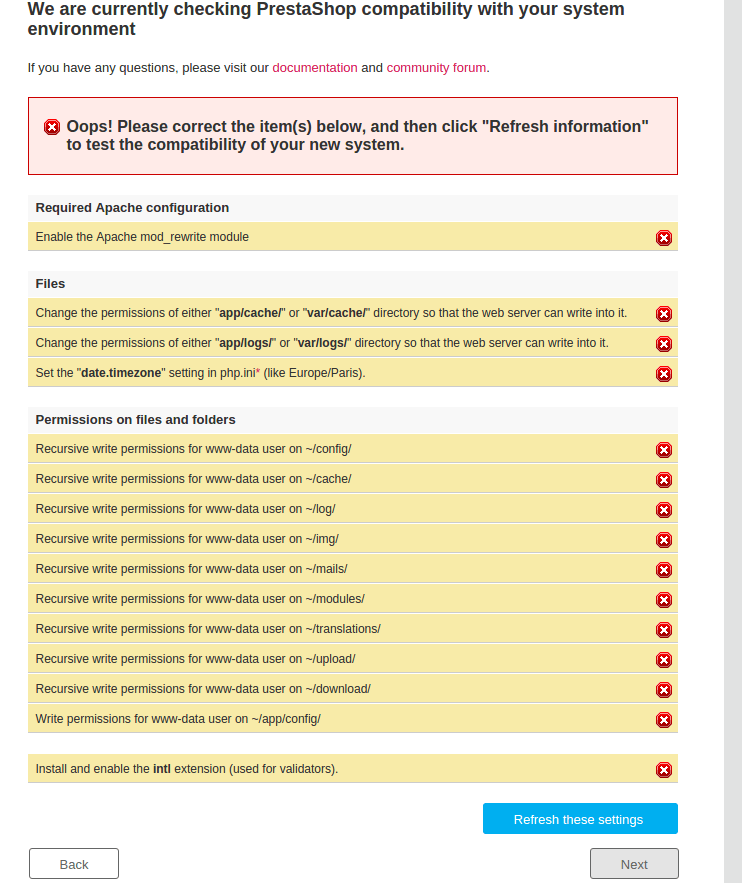
Run the commands below and lets fix these errors.
Install mod_rewrite
sudo a2enmod rewrite
Correct the file ownership issue’s
sudo chown -R www-data:www-data /var/www
Install PHP intl extension
sudo apt-get install php5-intl
Restart Apache
service apache2 restart
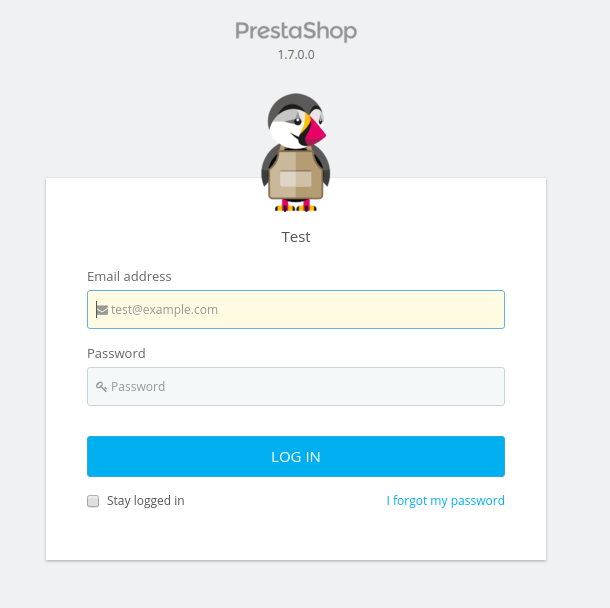
Now when you refresh the installation page you should have no more errors and you can install PrestaShop as normal YAY! Your admin url should be located at youripaddress/PrestaShop/admin-dev type it in and you should see the 1.7 login screen.
Awesome, log in and start looking around. Not much has changed in the back office, the product and modules pages have changed, and there have been some design tweaks. If you go to the product page or the module page in the back office, you will notice they are broken. To fix this, type in the command below.
vi /etc/apache2/apache2.conf
Once you are in the file, scroll to the very bottom of the file and press the letter i then paste the lines below in the bottom of the file.
DocumentRoot /var/www

<Directory /var/www/>
    Options Indexes FollowSymLinks MultiViews
    AllowOverride all
    Order allow,deny
    allow from all
</Directory>
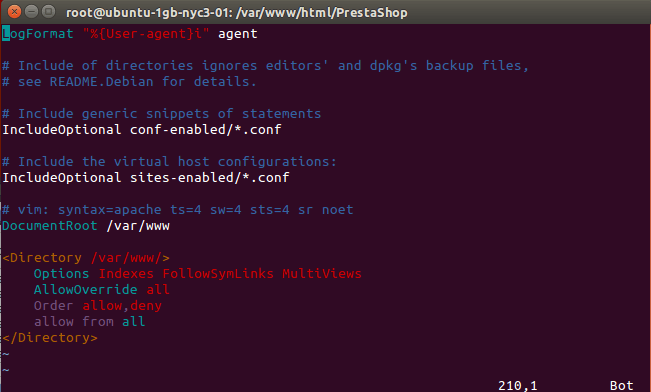
Once they are pasted in press escape, then press shift + : Now type wq and press enter. This will save the changes to the http configuration file. Now all you have to do is restart Apache using the command below.
service apache2 restart
Now everything should work perfectly.
1.7 is still evolving, things are expected to change in it frequently through the building process. Let us know your thoughts below, do you feel like it is a big enough change? Too much advertising? Is it any faster than 1.6?
About the Author: Lesley Paone
Lesley has worked in e-commerce for over a decade, and is the founder of dh42. Starting out with PrestaShop and brancing out into other platforms like Shopify. He loves all things e-commerce and loves a challenge, in his spare time he helps moderate several forums on SEO, e-commerce, as well as the PrestaShop forum. If you have any questions for him about any of his articles just use our contact form to contact him.