In the first article we learned how to take the query string off the logo and to reduce the size of the images. Now we are going to get into making all the images into css sprites that we can and modifying the .htaccess file to speed up your site.
Keep in mind that these optimizations are being done on a default Prestashop installation, when you use custom themes and different modules things will change and get more complex.
Making Sprites
Using sprites instead of multiple images reduces the requests from the server. Think about it this way, you can say “Can I have some milk, Can I have some cookies, Can I have a napkin”. Or you can say “Can I have some milk, cookies, and a napkin”. that is what using sprites does, instead of loading 26 images, it load 1 image and uses CSS to position the image. By turning those many request into one request you are speeding up the way your site loads. I am going to be using Sprite.me for this. It installs as a book marklet and is very hand for doing this. Once you get it installed run it and you should see something like this.
![]()
Notice how at the bottom that it has non sprited images. What I did was drag these images up to the sprited list. So that all the images would be in the sprite. We won’t end up using them all, because the way that the CSS for Prestashop is written, it is just easier to add them all, it does not translate into much overhead. Once you have added all of the images you want to click on make sprite. Now right click on that image and save it to your computer. After you have done that click on Export CSS.
Now then on to harder
Sprite.me makes great sprites, but they are bloated. Run your sprite file through smush.it or kraken.io then upload it to your themes/prestashop/img directory. Now for the harder part. Click on the export CSS button and you will get a page the looks like this.
![]()
Now you have to go through your CSS files and replace the calls to the regular images with the calls to the sprite and the background position of the sprite. Lets look at the first three on the list, the CSS for it is in the themes/prestashop/css/modules/blockpermanentlinks/blockpermanentlink.css file. This is what the file looks like when you open it.
![]()
You will want to go through the file and replace the calls to each image with a call to the sprite, then you want to have the background position of the sprite. My file ended up looking like this.
![]()
This is a tedious process going through all of the files and finding each image to replace. What I did was search for the original image in the CSS file by the image name that is struck out in the sprite.me css file. Here is a list of all of the files that the images should be in.
themes/prestashop/css/global.css
themes/prestashop/css/modules/blockcart/blockcart.css
themes/prestashop/css/modules/blockmyaccount/blockmyaccount.css
themes/prestashop/css/modules/blockpermanentlinks/blockpermanentlinks.css
themes/prestashop/css/modules/blocksearch/blocksearch.css
themes/prestashop/css/modules/blockuserinfo/blockuserinfo.css
In replacing the files with the sprites, I found that there are two images that do not like to be replaced because of the way that the css is written. They are in the image below, not the line numbers will more than likely be different from adding to the css with this article.
![]()
One thing I do as I am replacing the images, is to upload the file you are working on frequently and reload the site frequently to see if there are any problems. It is easier to catch them when they happen then trying to trace them after you have made a lot of changes. Once you get the CSS file updated, on to the .htaccess file.
.htaccess and et tags
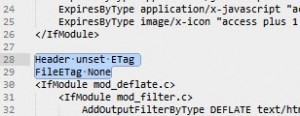
Prestashop optimizes your .htaccess file by setting the expires on your files and also turning on gzip compression. One thing it does not do is disable your et tags. You should especially disable these if you are using media servers or a CDN service, because they are a waste of information being transferred in the headers. Even if you are running just in server, you can benifit from removing the et tags. In your site root, open your .htaccess and add this to it.

Header unset ETag
FileETag None
That will turn the et tags off. There might already be a declaration that has something similar to FileETag INode MTime Size just delete that and replace it with the above.
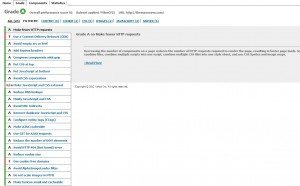
Now lets test the site for speed. In google page speed, this is what the site is registering now.

We have taken the site from a 82 all the way up to a 97, that is not bad at all. The way Prestashop is set up, it is almost impossible to defer the parsing of the javascript, so we are just going to leave it the way it is.
I have always found Yslow more difficult to get a site speed higher in, but lets see how the site is registering in Yslow.

92 and an A, to bad either. The only suggestions it gives is to set up a CDN and to serve static resources cookie free. Soon, I will go over how to set up a CDN using the media servers, until then enjoy your speedier shop.
About the Author: Lesley Paone
Lesley has worked in e-commerce for over a decade, and is the founder of dh42. Starting out with PrestaShop and brancing out into other platforms like Shopify. He loves all things e-commerce and loves a challenge, in his spare time he helps moderate several forums on SEO, e-commerce, as well as the PrestaShop forum. If you have any questions for him about any of his articles just use our contact form to contact him.
