
If you are not using Prestashop 1.6 yet, you really should check it out. It has a redesigned back office, template, and a lot of speed enhancements as well. One thing you can do to further optimize the loading performance of Prestashop is to use Media Servers, otherwise know as a CDN with your site.
Setting up the Media Servers
I chose to go with MetaCDN with this article, because I have heard a lot of good things about them lately, but I haven’t had a chance to check them out yet. One of the great things about MetaCDN is they have a 14 day free trial that does not require a credit card to test out.
Once you sign up for an account with them and validate it, you will be taken to a page that looks like the image below.
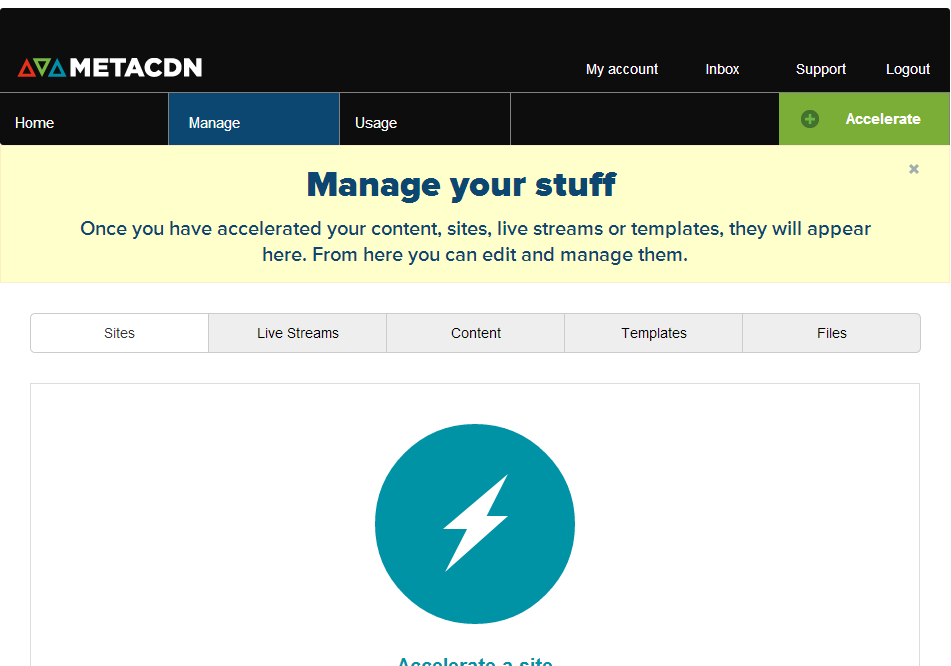
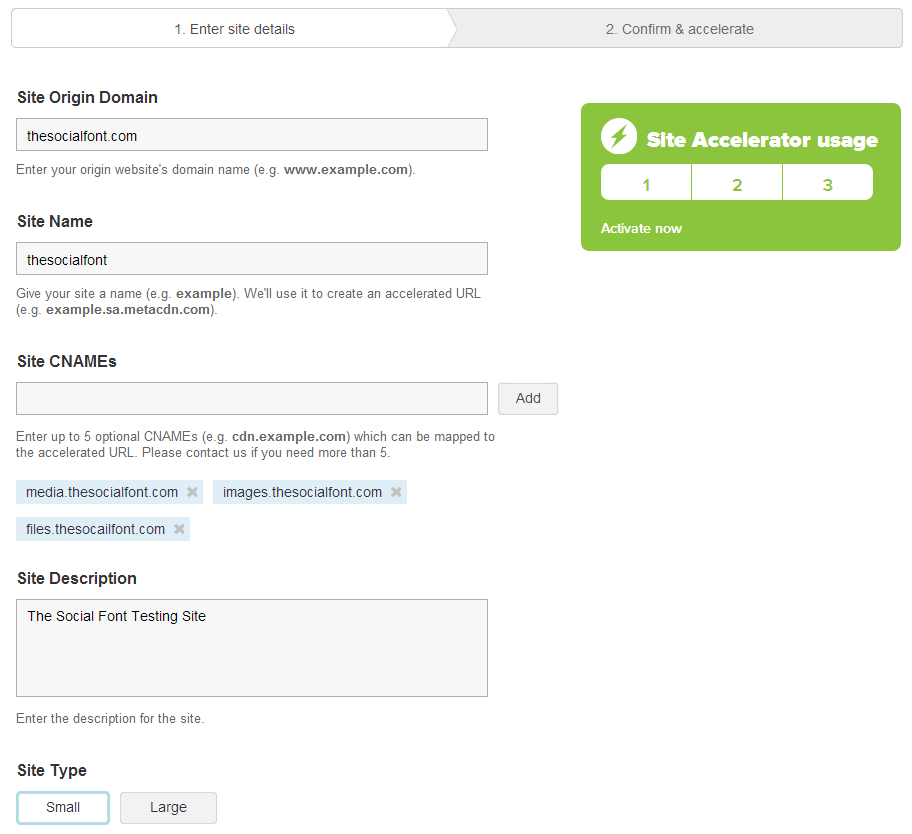
If you click on the lightning bolt it will take you to the area where you can add your website information. If you look at the image below you can see the information I added for the website I am optimizing. If you notice I have added 3 different CDN addresses, because Prestashop supports having 3 media servers. Also notice how I have small selected for the site. This actually refers to the files sizes, not the size of your site. If you have a lot of files over 10mb, use the large option, which no e-commerce site should really have.
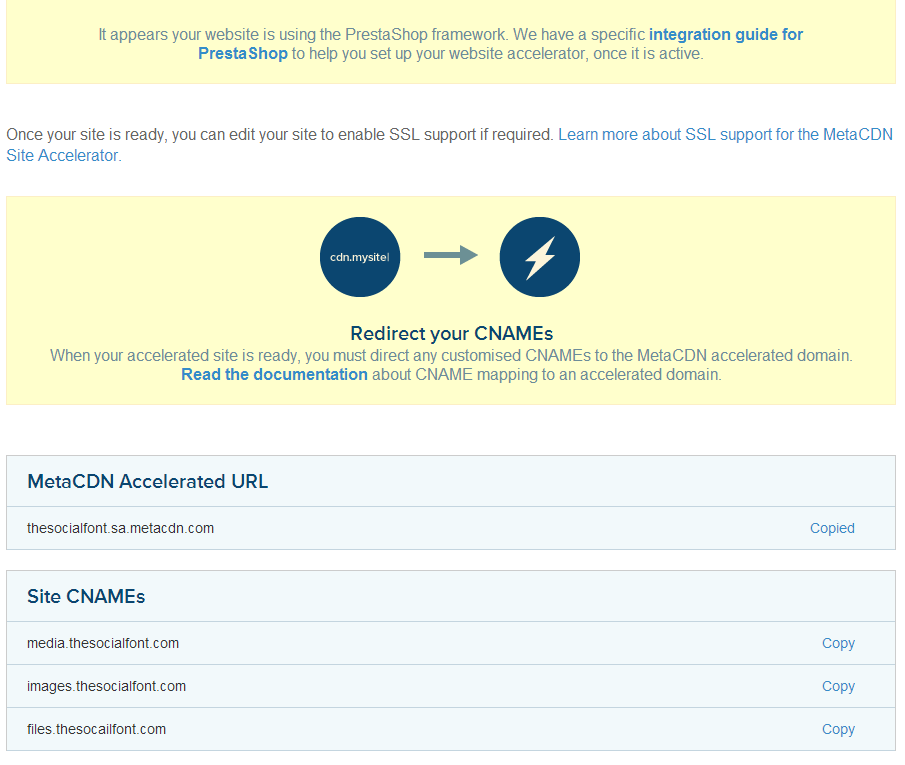
Once you have the information entered you will be directed to another page. On the next page you will need to copy the accelerated domain address. You will need this address in just a minute to set up your cname’s in your cpanel.
Setting up the Cname in Cpanel
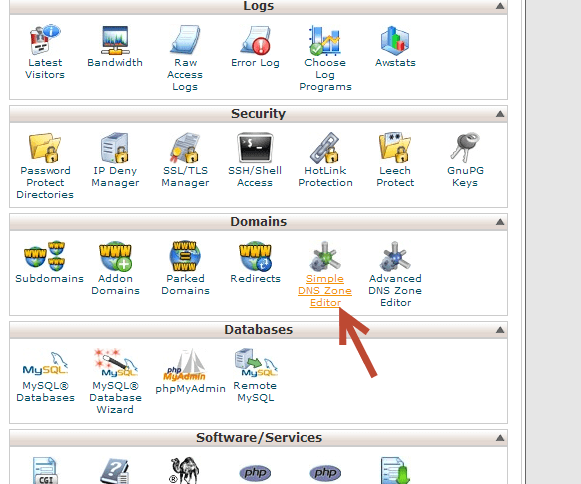
Next you are going to want to log into your cpanel account so that you can set up the Cname aliases so that your media servers will work off of your site’s domain name. Once you get logged in you are going to need to click on the “Simple DNS Zone Editor” like in the image below. If your Cpanel does not have this for some reason, you will need to contact your host and tell them what to add.
Once you are in the editor, you will need to enter the subdomain that you want to use in the top box of the Cname Record and then you will need to enter the information you copied from MetaCDN in the bottom section, like in the image below.
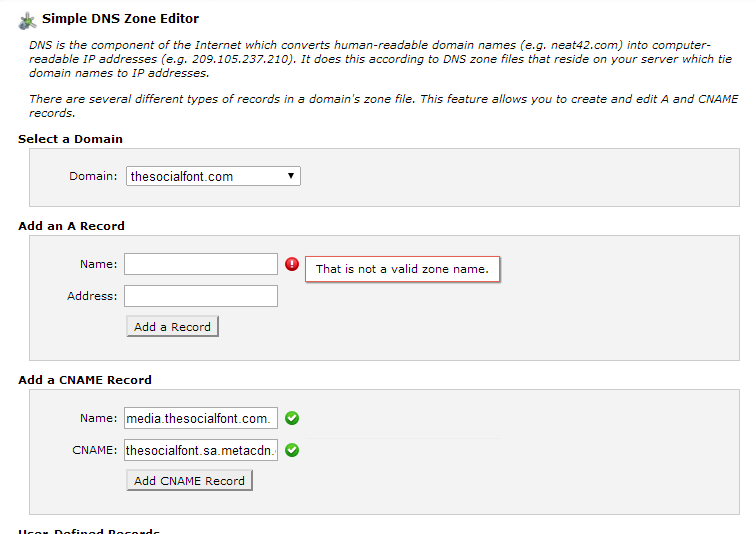
Once you have that information entered it might take 10 minutes to an hour until the subdomains work correctly, so you might have to wait a little while. Make sure you make an entry for each subdomain that you created in MetaCDN as well. All of the subdomains will point back to that same address that MetaCDN gave you, no matter how many subdomains you use.
Setting the Media Servers up in Prestashop
Once you have confirmed the media servers are working, you can do this by going to the subdomains and your site should load or redirect you to your site, you can add them to Prestashop. You will need to go to Advanced Parameters then Performance to add them, you simply add them like in the image below. Notice how you do not need to add http:// to them to make them work.

After you have added them, that is all you need to do. I would test your site to make sure everything works correctly, some lower quality themes that were not professionally written might have problems with them, but for the most part all themes should be compatible.
About the Author: Lesley Paone
Lesley has worked in e-commerce for over a decade, and is the founder of dh42. Starting out with PrestaShop and brancing out into other platforms like Shopify. He loves all things e-commerce and loves a challenge, in his spare time he helps moderate several forums on SEO, e-commerce, as well as the PrestaShop forum. If you have any questions for him about any of his articles just use our contact form to contact him.
