What are Google Rich Snippets? They are Google’s new way of organizing the web. You can use them with blogs, recipes, people, reviews, software, music, and products. I am about to show you how use rich snippets with the product pages in Prestashop.
The Basics
You are going to need to know how to FTP into your site for this and you will also need a text editor, I suggest Sublime Text if you do not feel comfortable doing this, we can do your whole site, which is more than just the product page for around $200. Just contact us here
Two things that will be helpful are the links the Rich Snippet testing tool and the Rich Snippet Specifications.
Lets get started…
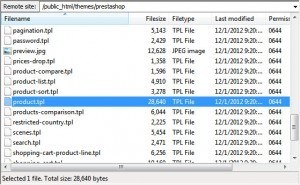
First thing you will need to do is to FTP into your site. For this tutorial we are using the default Prestashop theme, but in practice they should all be really similar. Now, to the files. The file you are going to need to edit will be your /public_html/themes/prestashop/product.tpl file Download the file to edit it on your computer. Remember to make a back up of the file in case you mess something up with it. As a note, this file is from version 1.4.9, so with other versions the line numbers might vary a little bit, everything should be close to the same.
Now for the snippets
The first thing you wan to do is insert the itemscope tag. It tells Google that it is dealing with a page that has a product on it. I like to insert it right above the breadcrumbs, because we will be using them also
.
<div itemscope itemtype="http://data-vocabulary.org/Product">
Now you will need to put a closing div tag at the very end of the file, like below.
![]()
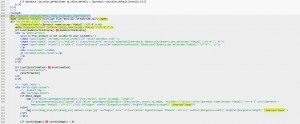
Now we have the page defined as a product page, we are on a roll now. Now we can insert the meta data. Google allows a certain amount of information to be hidden in the page, that is what we use the meta data for. Keep in mind that you cannot hide things such as price in the meta data, that has to be displayed on page. In the image below, I have added the markup for category, image and product name. Because things are becoming so scattered, at the end I will include a link to the finished template file.

Now to the good stuff
Rich Snippets have what is called an offer. The offer tells the specifics of the item, like the price, the seller, and other pertinent information. Generally it is the offer that people can buy the item at. That is what we are putting in now. Look at the image below and you can see that I have added the offer property. I have also started adding information to it such as the itemUrl, the seller, the currency, and the name of the item.

Now we have to close the offer that we added. I put a closing div right before the closing div that closes the pb-left-column.
![]()
The last thing that we add is the price. This is the most important aspect of the offer.

Summing things up
Adding the rich snippet information is one simple way that you can gain ground or even get ahead of your competitors. Google is starting to give preference to sites that utilize the rich snippets. There are many more snippets that can be added to a site such as, author, reviews, publisher. Utilizing these on your site will increase your organic SEO, which will drive more traffic to your site and hopefully convert into more sales. I am using the product.tpl file I made here in one of my test shops, you can see how it works using the Google Rich Snippet tool here.
This is a stock product.tpl from Prestashop, with rich snippets added. It may not be compatible with the theme that you are currently running, but you can use it as a guide for how to layout your rich snippets for the template that you are using.
About the Author: Lesley Paone
Lesley has worked in e-commerce for over a decade, and is the founder of dh42. Starting out with PrestaShop and brancing out into other platforms like Shopify. He loves all things e-commerce and loves a challenge, in his spare time he helps moderate several forums on SEO, e-commerce, as well as the PrestaShop forum. If you have any questions for him about any of his articles just use our contact form to contact him.

