
I receive a number of emails every week about speed optimization for Prestashop. People ask what I do, how it works, what can be expected, and other questions about the optimization process.I figured there is no better way to illustrate what is done and how it works then to show exactly how I have optimized one client’s site.
Patrik from Sweden contacted me about his Prestashop 1.6 site needing to be optimized. He just had a Template Monster theme installed and the site was not performing like he wanted. The first thing I do when figuring out how a site needs to be optimized is run it through the tools that I use. I use 3 main tools to check a site for optimization; Pingdom, GT Metrix, and Kraken.io. Each tool I use has a different purpose for me.
Kraken.io
With Kraken I look at the images on the site and see how much optimization can be made. By optimizing the images, I can speed up the site, because less information is being downloaded. Sites vary wildly with image optimization, some hardly need any, while others have several megabytes that can be removed by optimizing the images.
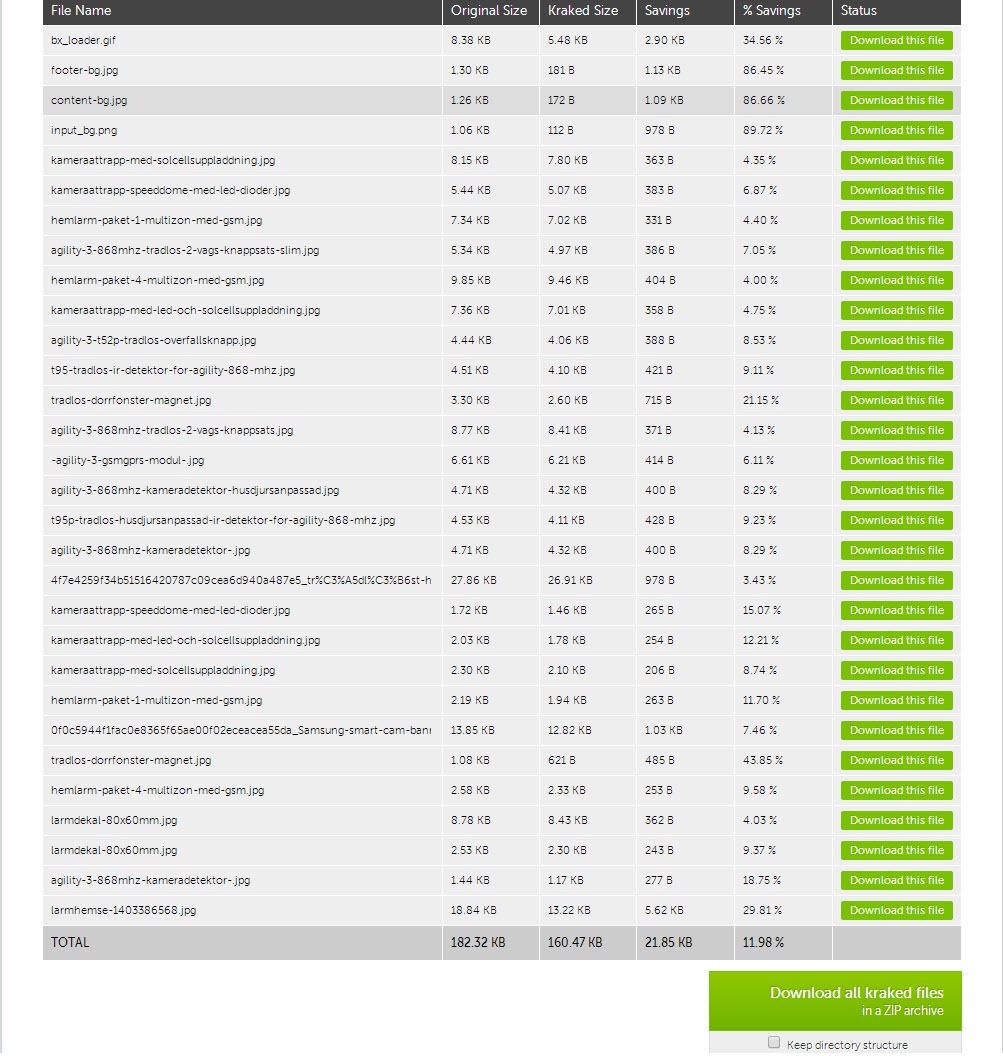
Looking at the results from Kraken, optimizing the images will only save 22kb. That is not too much, but it is still worth it.
Pingdom
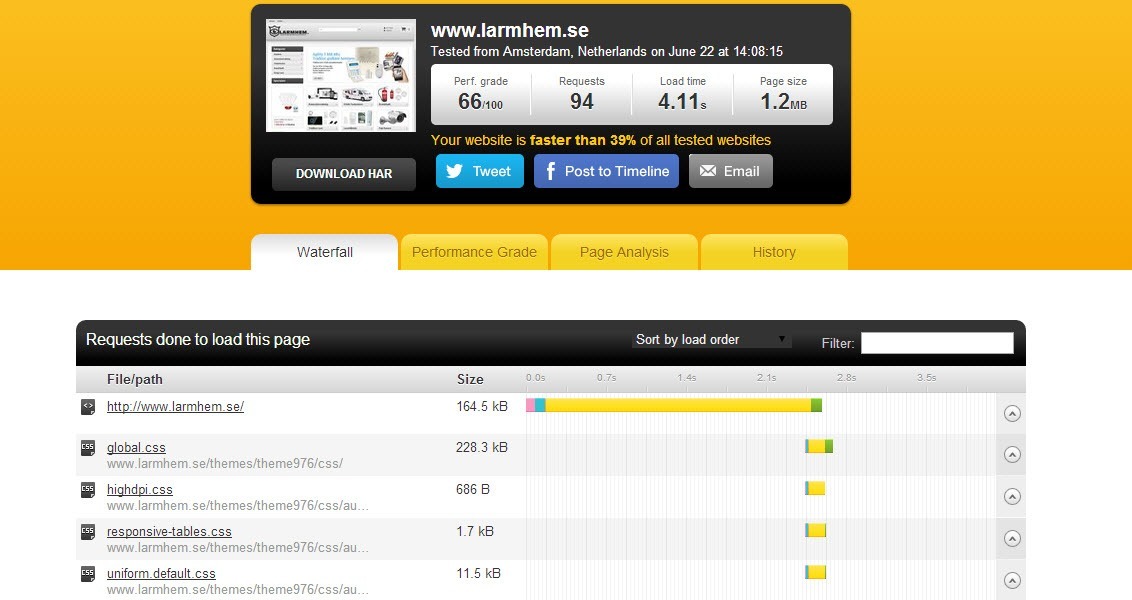
Next I run the site through Pingdom to see if I can see where any bottle necks are. Pingdom is great for trying to diagnose whether an issue is server related, network related, or database related. You can see in the image below that the wait time is about 2.5 seconds. That means when the file is requested from the server, it takes the server 2.5 seconds to start sending any information. Since Prestashop is database driven, to me this means the site is more than likely stressing the database out.
GT Metrix
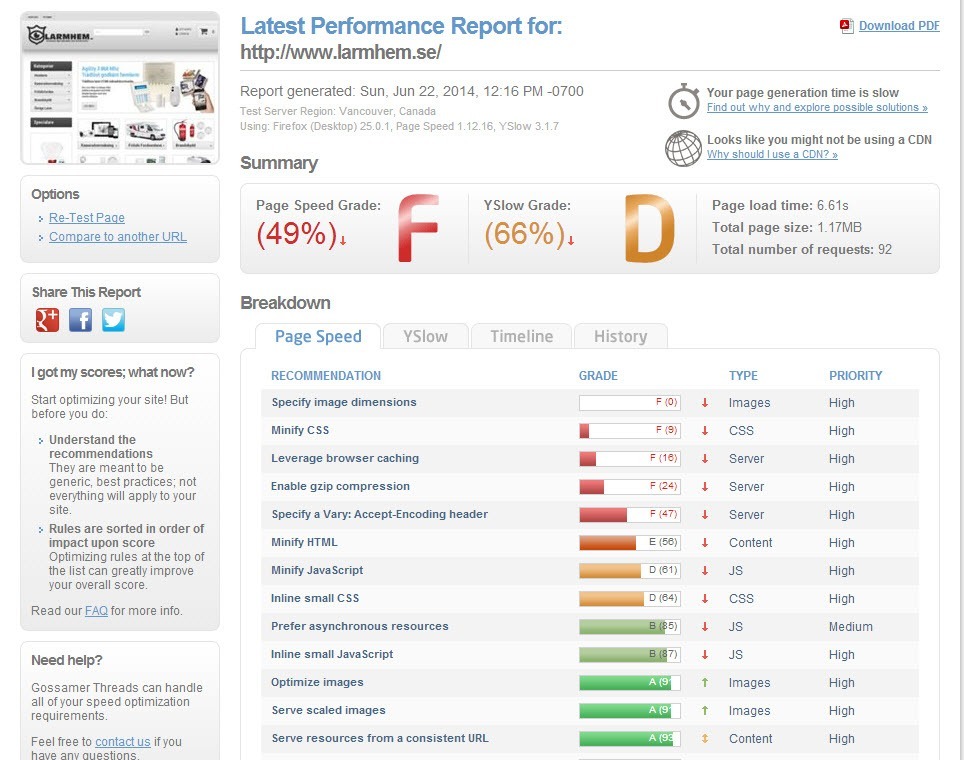
Next I run the site through GT Metrix, this give me the most complete overview of what I will need to do on the site and the gains that can be expected. Looking at the image below I can see the main things that need to be worked on are enabling Gzip on the server, using Prestashop’s CCC, and a several other small adjustments.
Getting Started
The first thing I am going to do with the site is turn on CCC and the Apache optimizations in the backend. Once that is done, I am going to start going down the list and looking at what can be optimized from the GT Metrix list.
Optimizing Image Sizes
In the two pictures below, both image area’s use the home_default image, but they are both scaling them to two different sizes in the theme. The natural image size is 270 x 270, but it is being scaled to 208 and 228 by the theme. So what I am going to do here is actually make two separate image sizes in the backend for each of those modules, this is so the images are created the size they need to be and are not scaled in the HTML.
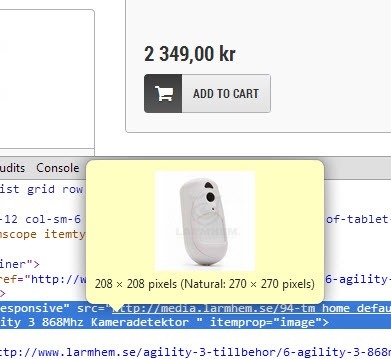
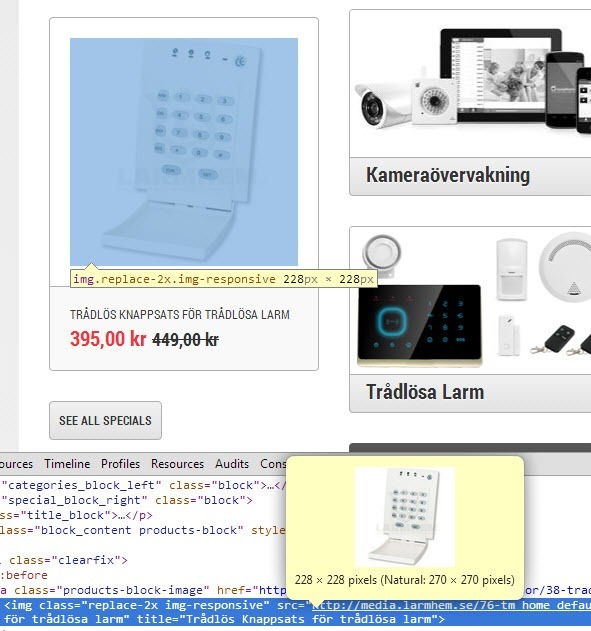
Upon further inspection, I can see the theme is configuring the images wrong. The theme set the wrong size for the images because the theme actually created that image type. Also it is using that image type in two places with different sizes. So what I did was change the tm_home_default to be generated at 208 x 208 for use in the Home Featured module. Then I created another image called tm_specials to be used with the Specials Block. After I did this, I need to regenerate the images and also edit the Specials Block template file to use the new image name.
Next you can see where GT Metrix notices that images dimensions are not specified in the template. From the looks of the image sizes that are not specified it is the Specials Block and the Home Featured modules that need to be edited. To fix this I edit the template files and add the image dimensions in.
Then I install the Smushit module from PrestaTeamShop and optimize all of the images on the site. The Smushit module is a pretty neat module, it will optimize images as you upload them on to the server. The way that I use it during an optimization is that I install it and optimize the images, then I uninstall and remove it. This keeps me in the licensing agreement. But I would highly recommend buying a license and keeping the module installed so it will optimize the images that you add after the optimization.

Once the images are optimized, I can see that the Font Awesome file is loading with a query string attached to tell the version number. In this theme, it is in the global.css file, so I edit the file to take off the version number. Appending a querystring to a resource like that will cause the resource to not cache, and you do not want that.
Since the site is hosted on Cpanel, the next thing I do is set up a pseudo CDN for the site. This basically uses a Cname to tell a directory to load from the site root. I use this to set up media servers without actually having a CDN site powering them. This will provide more download channels for the site and the site will download quicker.
Finishing Up
To complete the optimization process I use a the Express Cache module from Xtendify. This module has helped every site I have installed it on by leaps and bounds over not using it. What the module does is cache the whole pages in the database instead of having to make hundreds of database calls like Prestashop does on a page load.

Results
I left a few steps out in the optimization because they were repetitive, but I imagine you have an idea of what goes into the optimization of a Prestashop website. The important part now is the tests to see how much the site has been optimized. First let’s start with GT Metrix.
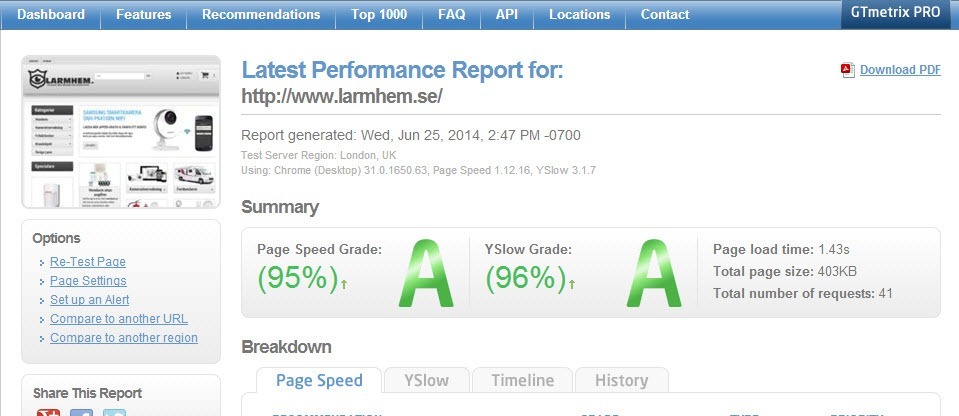
You can compare these test results to the one before, the site has decreased the requests by about 66%, decreased the file size by about 75%, and cut the loading time to less than one fourth of what it was before. One thing you have to take with a grain of salt in using GT Metrix is that they do not have as good of a network connection as Pingdom has.
Now I am going to look at the site with Pingdom, they have a testing server in Amsterdam, so the results will be more accurate on load time.

The results of the optimization really stand out in this test, the site went from loading in a little over 4 seconds to loading in almost one second. The requests and the site size is still down about the same as with the GT Metrix test, but by using a testing server in the same region as the site, you can really tell how well the optimization worked. Since this site targets that region, users to the site will have the best possible user experience because the site loads very quickly.
Cost Involved
It is impossible to price a site optimization without seeing the site that needs to be optimized. Every version of Prestashop has version specific tweaks that can be applied, every theme needs different optimization techniques, and every server operates differently. As a general rule our optimizations start out at $200 and go up from there. If you would like a price to optimize your site please contact us and we can give you a firm quote.
About the Author: Lesley Paone
Lesley has worked in e-commerce for over a decade, and is the founder of dh42. Starting out with PrestaShop and brancing out into other platforms like Shopify. He loves all things e-commerce and loves a challenge, in his spare time he helps moderate several forums on SEO, e-commerce, as well as the PrestaShop forum. If you have any questions for him about any of his articles just use our contact form to contact him.
