Knowledgebase

How to Install Wordpress via Softaculous in cPanel?

WordPress is a state-of-the-art publishing platform with a focus on aesthetics, web standards, and usability. WordPress is both free and priceless at the same time. More simply, WordPress is what you use when you want to work with your blogging software, not fight it. WordPress started in 2003 with a single bit of code to enhance the typography of everyday writing and with fewer users than you can count on your fingers and toes. Since then it has grown to be the largest self-hosted blogging tool in the world, used on hundreds of thousands of sites and seen by tens of millions of people every day.

1.
Log into your cPanel account.

2. In the "Software and Services" section, click on "Softaculous" Icon.Softaculous Icon
3. cPanel will redirect you to the Softaculous Panel.

4. On the left side of your screen you should locate the "Blogs" category. Click on it and then click on the "WordPress" link that will appear.
Wordpress Softaculous Icon

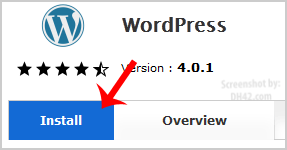
5. Click on the "Install" button
Wordpress Install


6. Fill the necessary field under the "Software Setup" field:
  • Choose Domain: If you don't have multiple domains, leave this as it is.
  • In Directory: If you want to install this in a directory, for example example.com/directory, enter the directory name. Otherwise, leave this blank to install in your main domain example.com
  • Database Name: You can leave this as it is.

7. Under the "Database Settings" field:
Table Prefix: Leave this as it is, unless you are installing multiple blogs using the same database.


8. Under the "Site Settings" field:
  • Site Name: Enter the name of your website, such as "my first website".
  • Enable Multisite (WPMU): Leave this as it is.
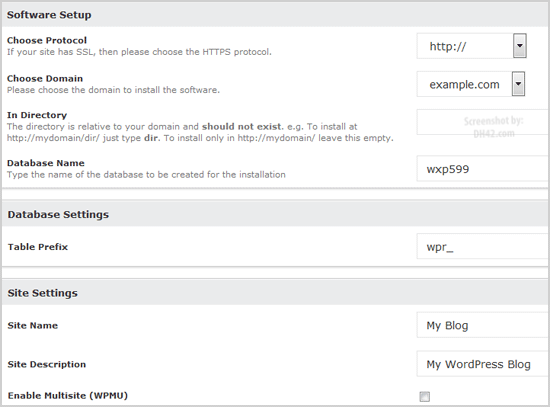
Wordpress Install Screen


9. Under the "Admin Account" field enter the following information:
  • Admin Username: Your new WordPress username (for security reason do not use the "Administrator" or the "Admin" username.
  • Admin Password: Use a strong password.
  • Admin Email: Your e-mail address.
  •  
Note: Copy the admin username and password on a notepad because you will need these login details to access the admin area of your WordPress blog.


10. Choose Language: You can chose the language of your WordPress blog. The default language of WordPress is English.
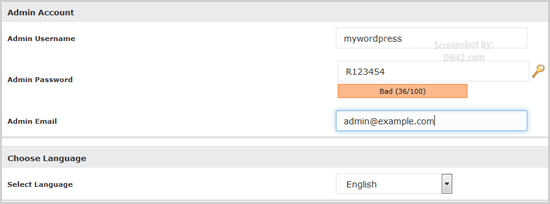
Wordpress Lanaguage


Finally, scroll down to the end of page and click on the Install Button.
Wordpress Installed

  • 0 Users Found This Useful
Was this answer helpful?

Related Articles

How to Install Textpattern via Softaculous in cPanel?

Textpattern is a web application designed to help overcome the hurdles to publishing online, and...

How to Install Dotclear via Softaculous in cPanel?

Dotclear is an open-source web publishing software created in 2002 by Olivier Meunier. A one...

How to Install Ghost via Softaculous in cPanel?

Ghost is an Open Source application which allows you to write and publish your own blog, giving...

How to Install LifeType via Softaculous in cPanel?

LifeType supports multiple blogs and users, media management, generation of standard content,...

How to Install Pixie via Softaculous in cPanel?

Pixie is a free, open source web application that will help quickly create your own website. Many...